Chipotle Hummus Quesadillas

Chipotle Hummus Quesadillas

These colorful and absolutely delicious quesadillas are a great family meal for nights when time is tight. As long as you have handy a few plant-based staples—i.e., salsa, oil-free hummus, frozen corn, and black beans—you can whip these up in no time.

These colorful vegan quesadillas are perfect for nights when you need to throw together a quick dinner. Grocery store staples are transformed into a mouthwatering feast and a smoky chipotle hummus adds creaminess to this queso-free finger food. Served with a fruity mango salsa that only requires two ingredients, this party on a plate is a comforting and quick meal that you’ll return to again and again.

Tip: If you can’t find a frozen Mexican or Southwest corn blend, use 2 cups of frozen roasted corn and ½ cup of chopped fresh red bell pepper.

INGREDIENTS

  • 1 8-oz. container oil-free hummus (such as Oasis Zero Fat or Cedar’s Fat-Free)
  • 2 chipotle chiles in adobo sauce, finely chopped
  • 1 12-oz. package frozen unseasoned Mexican or Southwest corn blend
  • 1 15-oz. can no-salt-added black beans, rinsed and drained (1½ cups)
  • ½ cup sliced scallions
  • 12 6-inch corn tortillas
  • 1 cup fresh salsa
  • ½ cup chopped fresh mango

INSTRUCTIONS

  1. In a small bowl stir together hummus and chipotle chiles; mix well. In a large skillet cook frozen vegetables over medium 5 to 6 minutes or until crisp-tender, stirring occasionally and adding water, 1 to 2 tablespoons at a time, as needed to prevent sticking. Stir in black beans and scallions; cook 1 to 2 minutes or until heated through.
  2. Spread hummus on six tortillas. Top with vegetable mixture and remaining tortillas, pressing lightly.
  3. Heat a nonstick griddle over medium. Cook quesadillas, in batches, 4 to 5 minutes or until browned, turning once. Keep warm on a baking sheet in a 200°F oven while cooking remaining quesadillas. Cut into wedges.
  4. Stir together salsa and mango. Serve with quesadillas.

View List Of All Recipe On Create That Body

Learn More About Isabella Hawke | Follow Us On Facebook | Instagram

Put Yourself First

Put Yourself First

You know that discomfort you feel when you want to put yourself first but don’t feel worthy enough?

Over the last 27 years I’ve helped women overcome Self Sabotage, Self-Doubt, and Self Image Issues. I’ve seen thousands of people who are sick and tired and can’t take anymore of being disappointed in themselves. There has to be more to life than this!

It’s not just you that notices how you feel, it’s your friends and family too. They notice it all in your actions, your speech, your posture, even the way you present yourself to the world.

How do you think they feel watching you give up on your potential and future?

I know you’re scared; rejection and failure are so debilitating, but they don’t have to be, they can be liberating!

YOU can handle random people judging you? Afterall, they don’t know you so who are they to Judge…right?

You look on social media and it just makes you feel worse about yourself. Are you sick of feeling like a second-class citizen? Then it’s time for change.

Are you tired of the dread, shame, disappointment, resentment, and regret that constantly races through your thoughts daily? Then it’s time for change.

I used to be like that, feeling empty, not good enough, and like I was wasting my life every single day. I was surrounded by people who made me feel bad about myself and my abilities.

Eventually I had to make that change… I woke up.

And now I want to help you wake up.

I have a question for you . . .

Are you ready to improve your health and lifestyle so you can achieve your full potential and become the person you were born to be?

If you are ready to destroy your limitations and level up to claim the life and income you finally deserve, then I have some good news for you.

I’m holding some free training and I’d love you to be there so you can learn how to take back the reigns and start living the life you were born to live.

Sign up >>> for my free training *

*Put a link to the facebook groyp please.

View List Of All Recipe On Create That Body

Learn More About Isabella Hawke | Follow Us On Facebook | Instagram
Vegan Cheesy Crackers

Vegan Cheesy Crackers

These cheesy vegan cracks are a great gluten-free bread option to serve with soup, stew, as a dipper, or on their own. Simple to make, freezable, and healthier and more affordable than store-bought, you’ll have these delicious crackers added to your regular rotation before you know it! Note: To make these gluten-free, be sure to use certified gluten-free oat flour.

Making crackers at home is much easier than you might think! These flavorful little crisps are the healthy vegan alternative to Cheez-It crackers, perfect for dipping in hummus or enjoying on their own as a midday snack. The flavorful combination of spices, miso paste, tahini, and lemon juice adds a subtle cheesy flavor that grows more enticing with each bite. Make them gluten-free by using certified gluten-free oat flour.

INGREDIENTS

  • 1 cup brown rice flour, plus more for dusting
  • ½ cup oat flour
  • ½ cup chickpea flour
  • ½ cup almond flour
  • ½ teaspoon regular or sodium-free baking powder
  • ½ teaspoon garlic powder
  • ½ teaspoon onion powder
  • ½ teaspoon paprika
  • ½ teaspoon dried oregano, crushed
  • ½ cup plus 2 tablespoons unsweetened, unflavored plant-based milk
  • 1 tablespoon tahini
  • 1 tablespoon miso paste
  • 1 teaspoon lemon juice

INSTRUCTIONS

  1. Preheat oven to 325°F. Line two baking sheets with parchment paper. In a large mixing bowl combine the first nine ingredients (through oregano).
  2. In a small blender combine milk, tahini, miso paste, and lemon juice. Cover and blend until smooth. Add milk mixture to flour mixture; knead lightly to form a dough. Divide dough into two equal portions; shape each portion into a brick.
  3. Place a silicone baking mat on a clean work surface and dust it lightly with rice flour. Place one brick of dough on the mat and use a rolling pin to roll the dough into an even 1/16-inch-thick rectangle. Poke the rectangle several times with a fork.
  4. Using a 2-inch square cookie cutter (or a pizza cutter, bench scraper, or long knife), cut rectangle into 2-inch squares. Transfer the squares to one of the prepared baking sheets.
  5. Add any remaining dough scraps to the second dough brick and repeat with the second dough brick and baking sheet.
  6. Bake crackers 20 minutes or until lightly browned, rotating baking sheets a half turn after the first 10 minutes. Let crackers cool completely on wire racks. To keep crackers crisp, store them in a resealable plastic bag at room temperature for up to 10 days.

View List Of All Recipe On Create That Body

Learn More About Isabella Hawke | Follow Us On Facebook | Instagram
Springtime Beet Soup

Springtime Beet Soup

Get a spoonful of spring with this creamy, colorful beet soup, which has full, well-balanced flavors without being heavy. For the most vibrant appearance, choose the darkest red beets you can find.

Comforting and vibrant, this delicious spring soup will dazzle the eyes and delight the taste buds. New season beets give sweet flavor and brilliant color, while potato and cauliflower add creamy, earthy flavor to every mouthful. Serve with a swirl of cashew cream for extra creaminess—the contrast in color looks amazing.

Tip: If garlic scapes are not available, use 2 tablespoons chopped fresh chives and 1 clove garlic, minced.

INGREDIENTS

  • ½ cup chopped red onion
  • 2 tablespoons sliced garlic scapes, plus more for garnish (see tip in intro)
  • 6 cups low-sodium vegetable broth
  • 3 cups chopped peeled beets
  • 3 cups chopped cauliflower
  • 3 cups chopped red potatoes
  • 2 teaspoons dried herbes de Provence
  • ¼ teaspoon crushed red pepper
  • Freshly ground black pepper, to taste
  • ⅓ cup raw cashews, soaked for 30 minutes
  • ¼ teaspoon garlic powder
  • ¼ teaspoon onion powder
  • ¼ teaspoon dry mustard
  • ½ to ¾ cup unsweetened, unflavored plant-based milk
  • Fresh microgreens and/or radish sprouts (optional)

INSTRUCTIONS

  1. In a large pot cook red onion and garlic scapes over medium 3 minutes, stirring occasionally and adding broth, 1 to 2 tablespoons at a time, as needed to prevent sticking. Add remaining broth and the next five ingredients (through crushed red pepper). Increase heat to high. Bring to boiling; reduce heat. Cover and simmer 30 to 35 minutes or until vegetables are very tender. Cool slightly. Working in batches, transfer soup to a blender; cover and blend until smooth. Season with black pepper.
  2. In a small blender or food processor combine cashews, garlic powder, onion powder, and dry mustard. Blend until smooth, gradually adding milk until cashew cream is about the same consistency as the soup.
  3. Ladle soup into bowls. Top each serving with 2 tablespoons cashew cream and use a spoon to swirl. If desired, garnish with additional garlic scapes, microgreens, and/or radish sprouts.

View List Of All Recipe On Create That Body

Learn More About Isabella Hawke | Follow Us On Facebook | Instagram
10 Of The Best Vegan Make Up Brands And Why You Should Use Them

10 of the best vegan make up brands and why you should use them

Looking for vegan-friendly makeup brands that offer high-quality products? Look no further than the 10 best vegan make up brands, each of which is known for its superior quality and wide range of products.

With an increasing number of people choosing to go vegan, vegan makeup brands have become more popular than ever before. These brands offer a variety of products, from foundation and mascara to lipstick and eyeliner, making it easier than ever to find exactly what you need for your personal beauty routine.

Some of the top vegan make up brands include Urban Decay, Leaping Bunny, Inika Organic, Wet n Wild Beauty, Pacifica Beauty, Tarte Cosmetics, Lush Cosmetics, Physicians Formula Organic Wear, Eco Diva Beauty, and Obsessive Compulsive Cosmetics. These brands are known for using high-quality vegan ingredients and for their commitment to animal welfare.

Urban Decay – With a wide range of vegan products, including foundation, eyeliner, and mascara, Urban Decay is one of the most popular vegan makeup brands. Their products are known for their high quality and long-lasting wear, making them a great choice for anyone looking for vegan beauty products that really deliver.

Leaping Bunny – As the only internationally recognized cruelty-free certification standard in the cosmetics industry, Leaping Bunny sets itself apart by offering consumers assurance that no new animal testing took place at any stage of product development. With everything from lipstick to nail polish to skincare products, Leaping Bunny has something for everyone.

Inika Organic – Founded in Australia in 2003, Inika Organic offers 100% vegan and cruelty-free mineral makeup made with certified organic ingredients. Their products are free of parabens, synthetic fragrances, and other harmful chemicals, making them a great choice for anyone looking for safe and healthy vegan makeup.

Wet n Wild Beauty – One of the most affordable vegan makeup brands, Wet n Wild Beauty offers a wide range of vegan-friendly products at drugstore prices. Their products are beloved by beauty bloggers and everyday consumers alike for their high quality and low price tag.

Pacifica Beauty – A relatively new vegan makeup brand, Pacifica Beauty has quickly become a favorite among vegan shoppers for their wide range of vegan-friendly cosmetics, skincare, and haircare products. Their products are made with natural ingredients and free of harmful chemicals, making them a great choice for anyone looking for safe and healthy vegan makeup.

Tarte Cosmetics – A popular vegan makeup brand, Tarte Cosmetics is known for their wide range of vegan-friendly products, including foundation, concealer, eyeshadow, and lipstick. Their products are made with natural ingredients and free of harmful chemicals, making them a great choice for anyone looking for safe and healthy vegan makeup.

Lush Cosmetics – One of the most popular vegan cosmetic brands, Lush Cosmetics is known for their handmade vegan soaps, skincare products, and cosmetics. With everything from shower gels to face masks to lip balms, Lush has something for everyone.

Physicians Formula Organic Wear – One of the only physician-developed organic cosmetics lines, Physicians Formula Organic Wear is a great choice for anyone looking for safe and healthy vegan makeup. Their products are made with certified organic ingredients and free of harmful chemicals, making them a great choice for anyone looking for safe and healthy vegan makeup.

Eco Diva Beauty – A popular vegan makeup brand, Eco Diva Beauty offers a wide range of vegan-friendly products, including foundation, concealer, eyeshadow, lipstick, and nail polish. Their products are made with natural ingredients and free of harmful chemicals, making them a great choice for anyone looking for safe and healthy vegan makeup.

Obsessive Compulsive Cosmetics – A cult-favorite vegan makeup brand, Obsessive Compulsive Cosmetics is known for their wide range of vegan-friendly products, including foundation, concealer, eyeshadow, lipstick, and nail polish. Their products are made with high-quality vegan ingredients and are free of harmful chemicals, making them a great choice for anyone looking for safe and healthy vegan makeup.

Whether you’re looking for a vegan foundation that offers full coverage or a vegan mascara that won’t smudge throughout the day, there is sure to be a vegan makeup brand that meets your needs. So why not give one of these top vegan make up brands a try today? You’ll love the results you get from their high-quality products

View List Of All Recipe On Create That Body

Learn More About Isabella Hawke | Follow Us On Facebook | Instagram
10 Make Up Tips For Older Women

10 Make up tips for older women

why is it important to put your makeup on correctly as you age?
As we age, our skin changes and our makeup needs to change with it. Here are some tips for eye makeup that older women can use to help them look their best:

1. Use a primer. This will help create a smooth canvas for your makeup and also help it to stay in place throughout the day.

2. Use a light hand when applying shadow. Heavy shadows can emphasize wrinkles and creases. Stick to light colors and use a brush to blend well.

3. Avoid using liner on the lower lash line. This can make eyes look smaller and accentuate any puffiness or dark circles. Instead, focus on the upper lash line and use a waterproof mascara to keep things in place.

4. Skip the glitter. Glittery shadows can highlight any imperfections on the skin around your eyes. Stick to matte shadows or those with a small amount of shimmer for a more flattering look.

5. Use a cream shadow if you have dry skin. This will help to prevent creasing and keep your makeup looking fresh all day long.

6. Set your makeup with a translucent powder. This will help to keep everything in place and prevent any shine from coming through.

7. Use waterproof mascara. This will help to keep your mascara from running or smudging throughout the day.

8. Be careful with falsies. If you use false eyelashes, make sure that they are not too heavy or thick. This can cause them to droop and look unnatural.

9. Use a brow pencil or powder to fill in your brows. This will help to define your eyes and give you a polished look.

10. Don’t forget the finishing touches! Add a touch of highlighter to the inner corners of your eyes and use a bit of shimmery shadow on the outer corners to really make your eyes pop.

By following these tips, you can create a beautiful eye makeup look that will stay in place all day long and will help you to create a beautiful and flattering eye makeup look that is perfect for older women. With a little bit of time and effort, you can easily find the right products and techniques that work best for you.

see our blog on the best vegan make up brands (add link)

View List Of All Recipe On Create That Body

Learn More About Isabella Hawke | Follow Us On Facebook | Instagram
Herb-Crusted Asparagus Spears

Herb-Crusted Asparagus Spears

For an easy and elegant side dish or appetizer, try these crispy garlic- and “Parmesan”- crusted asparagus spears. Coated with hemp seeds, paprika, nutritional yeast, and bread crumbs, you’d never guess they’re oil-free! These garlic and ‘Parmesan’-crusted asparagus spears make a tasty side dish, snack, or party appetizer. Easy and elegant!

INGREDIENTS

  • 1 bunch of asparagus (about 12 spears)
  • 2 tablespoons hemp seeds
  • 1/4 cup nutritional yeast
  • 1 teaspoon garlic powder or 3 garlic cloves, minced
  • 1/8 teaspoon ground pepper
  • Pinch of paprika
  • 1/4 cup whole wheat breadcrumbs
  • Juice of ½ lemon

INSTRUCTIONS

  1. Preheat the oven to 350°F.
  2. Wash the asparagus. To remove the white bottom end, hold each asparagus spear with both hands and bend it near the white end. The white end will snap off.
  3. Transfer hemp seeds to a small bowl and mix in the nutritional yeast, garlic, pepper, paprika, and breadcrumbs.  Stir and set aside.
  4. Arrange the asparagus spears side by side in a baking dish and sprinkle with the hemp mixture.
  5. Bake for 20-25 minutes or until asparagus are crispy.
  6. Serve and sprinkle with some lemon juice.

View List Of All Recipe On Create That Body

Learn More About Isabella Hawke | Follow Us On Facebook | Instagram

Festive Sourdough Focaccia

Festive Sourdough Focaccia

Festive Sourdough Focaccia

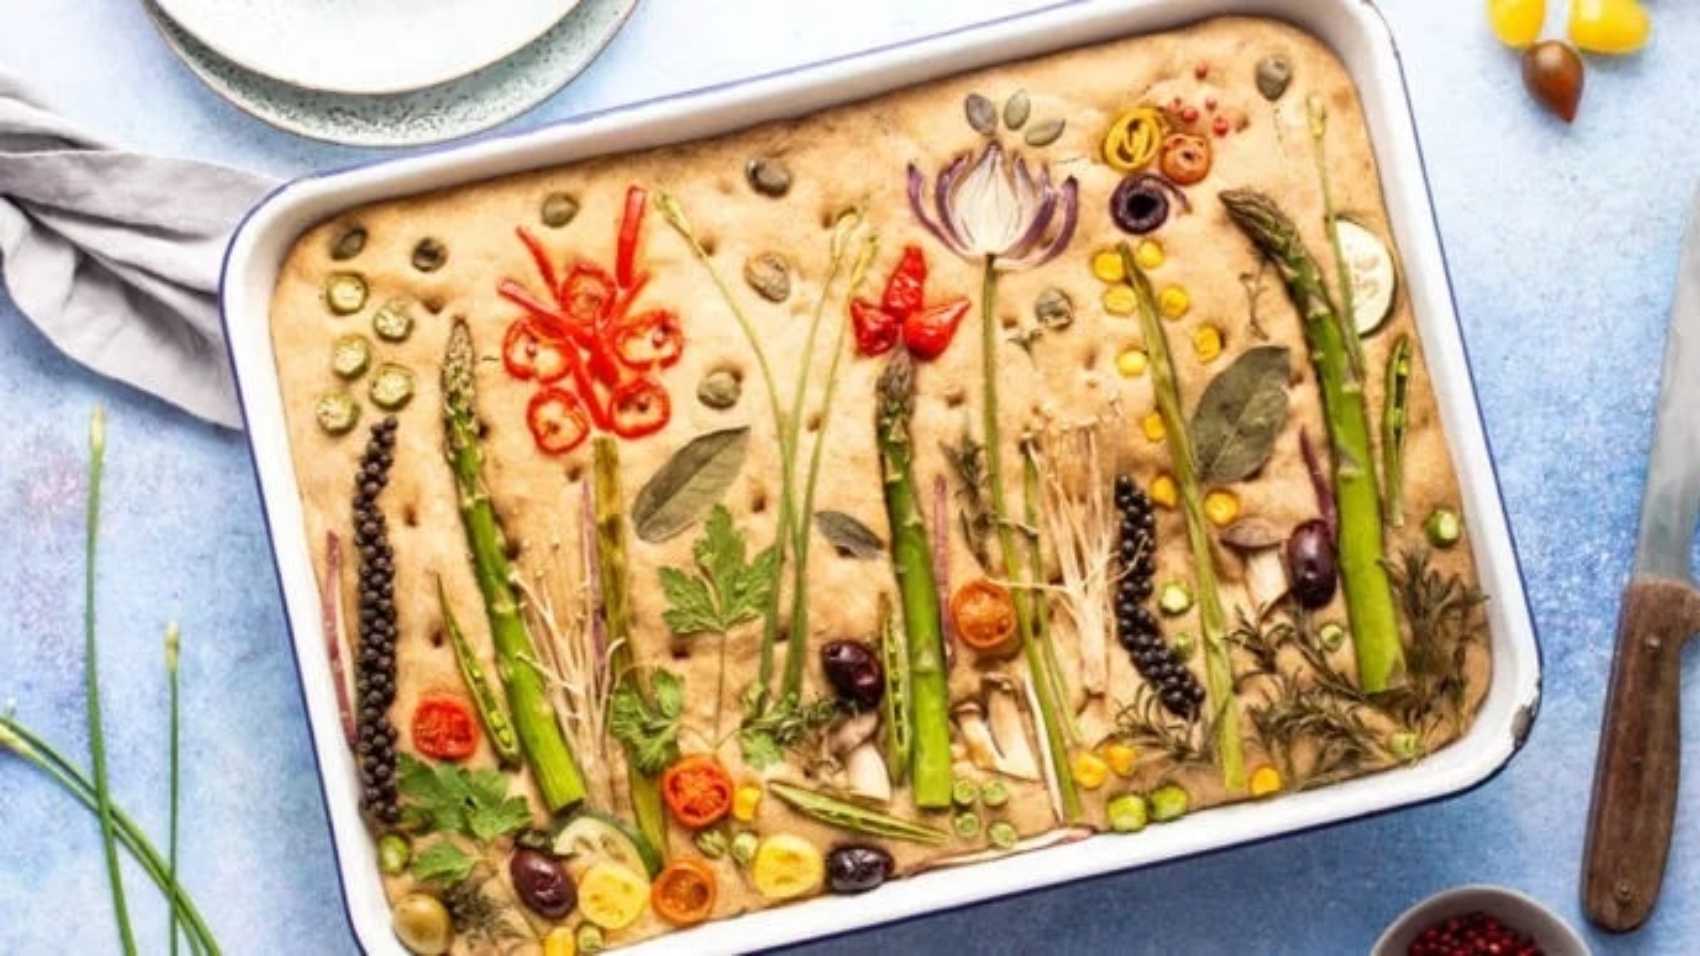
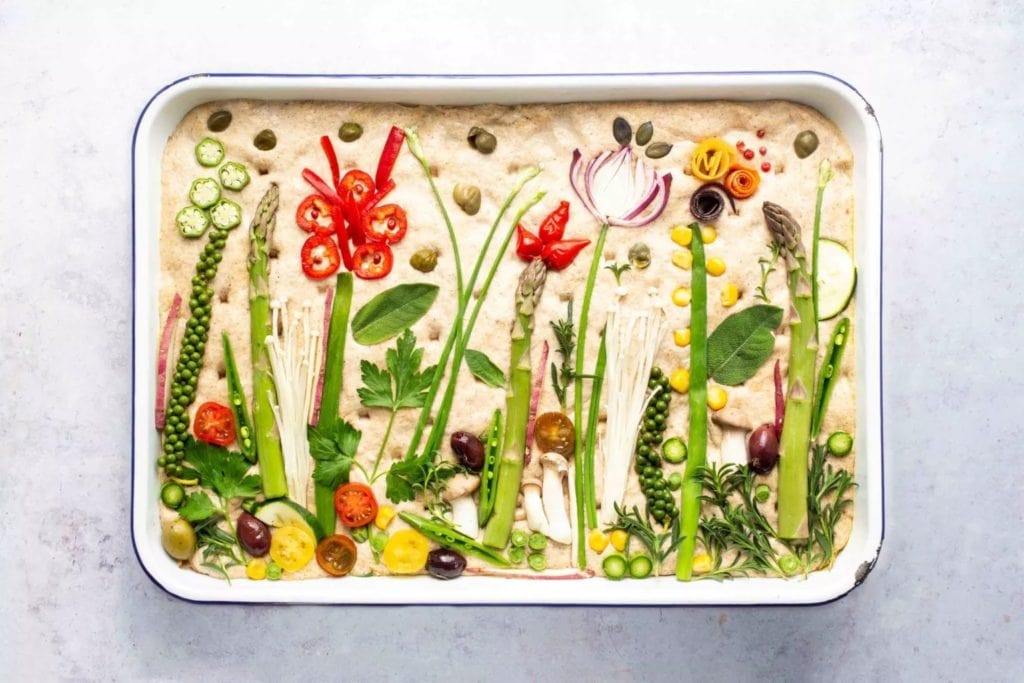
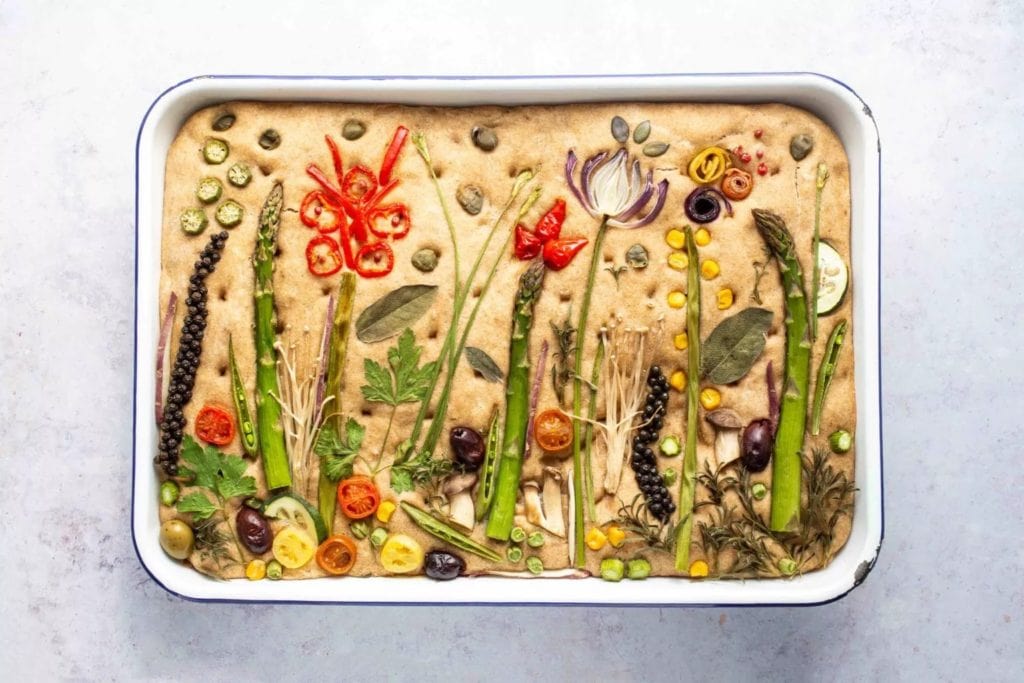
This decorative sourdough looks amazing on the table and is a fun project for the whole family. Chef Darshana shares ideas for ingredients to make the flowers, soil, and grass, but feel free to use what you have on hand and come up with your own masterful creation!

Here’s a fresh use for your idling sourdough starter. Decorating this festive focaccia can be a fun activity for the whole family. Feel free to get creative with the selection and placement of your toppings. I used the following herbs and veggies to create the floral effect, first placing the stems, then the flowers, then the soil and grass:

STEMS Parsley sprigs, scallions (green parts only), asparagus, fresh green peppercorns

FLOWERS Small bell peppers (any color), cherry tomatoes, small red onions, zucchini and/or yellow squash (cut into star shapes), pickled jalapeño chiles

SOIL, GRASS, AND MISC. FILLERS Capers, olives, okra, sliced jalapeño chiles, king oyster mushroom, sunflower or pumpkin seeds, chopped scallions, corn, enoki mushrooms

Before baking:

After Baking:

Festive-Sourdough-Focaccia-min

INGREDIENTS

  • 1 cup fed sourdough starter or discard
  • 2 teaspoons tahini
  • 2 teaspoons Date Paste
  • 2 cups whole wheat flour
  • 1 cup unbleached bread flour or all-purpose flour
  • 1 cup potato flour
  • 2 tablespoons nutritional yeast
  • 2 teaspoons sea salt
  • 1 teaspoon instant yeast
  • ¼ teaspoon freshly ground black pepper
  • 1½ cups unsweetened, unflavored plant-based milk
  • ⅓ cup brown rice flour (for dusting)
  • 3 cloves garlic, minced (1 tablespoon)
  • Assorted fresh herbs and veggies (see recipe intro for suggestions)

INSTRUCTIONS

  1. To make the sponge: In a stand mixer or a food processor fitted with a dough blade, combine the sourdough starter, tahini, date paste, and 1 cup warm water.
  2. In a large bowl combine the flours, the nutritional yeast, salt, instant yeast, and black pepper. Whisk to combine.
  3. Add the flour mixture to the sponge. Add 1 cup of the milk. Mix or process to form a smooth dough.
  4. Transfer dough to a bowl; cover with a clean kitchen towel. Let sit for 1 hour.
  5. Transfer dough to a clean surface liberally dusted with brown rice flour. Fold dough a few times; return to bowl. Cover again and let rise for 1 hour more.
  6. Line a 13×18-inch sheet pan with a silicone baking mat or parchment paper. Dust liberally with brown rice flour, especially the edges and corners. Transfer dough to prepared baking sheet and gently stretch dough to cover the whole sheet. (If dough doesn’t stretch easily, let it rest 10 minutes then try again.)
  7. Cover the sheet with clean towel and let stand for 1 hour.
  8. Preheat oven to 400°F. Uncover the sheet and poke dough with a wooden skewer to form dimples throughout.
  9. In a small bowl combine the remaining ½ cup milk and the garlic; whisk to combine. Brush mixture over dough surface.
  10. Arrange your chosen toppings in any pattern you wish. (See recipe intro for tips.)
  11. Bake 20 to 25 minutes or until golden brown on top.
  12. Remove from heat; let cool about 10 minutes. With the help of a large spatula, separate the focaccia from mat and pan and transfer to a large cutting board. Slice into rectangles for serving.

View List Of All Recipe On Create That Body

Learn More About Isabella Hawke | Follow Us On Facebook | Instagram

Tortilla Roll-Ups With Lentils And Spinach

Tortilla Roll-Ups With Lentils And Spinach

Tortilla Roll-Ups With Lentils And Spinach

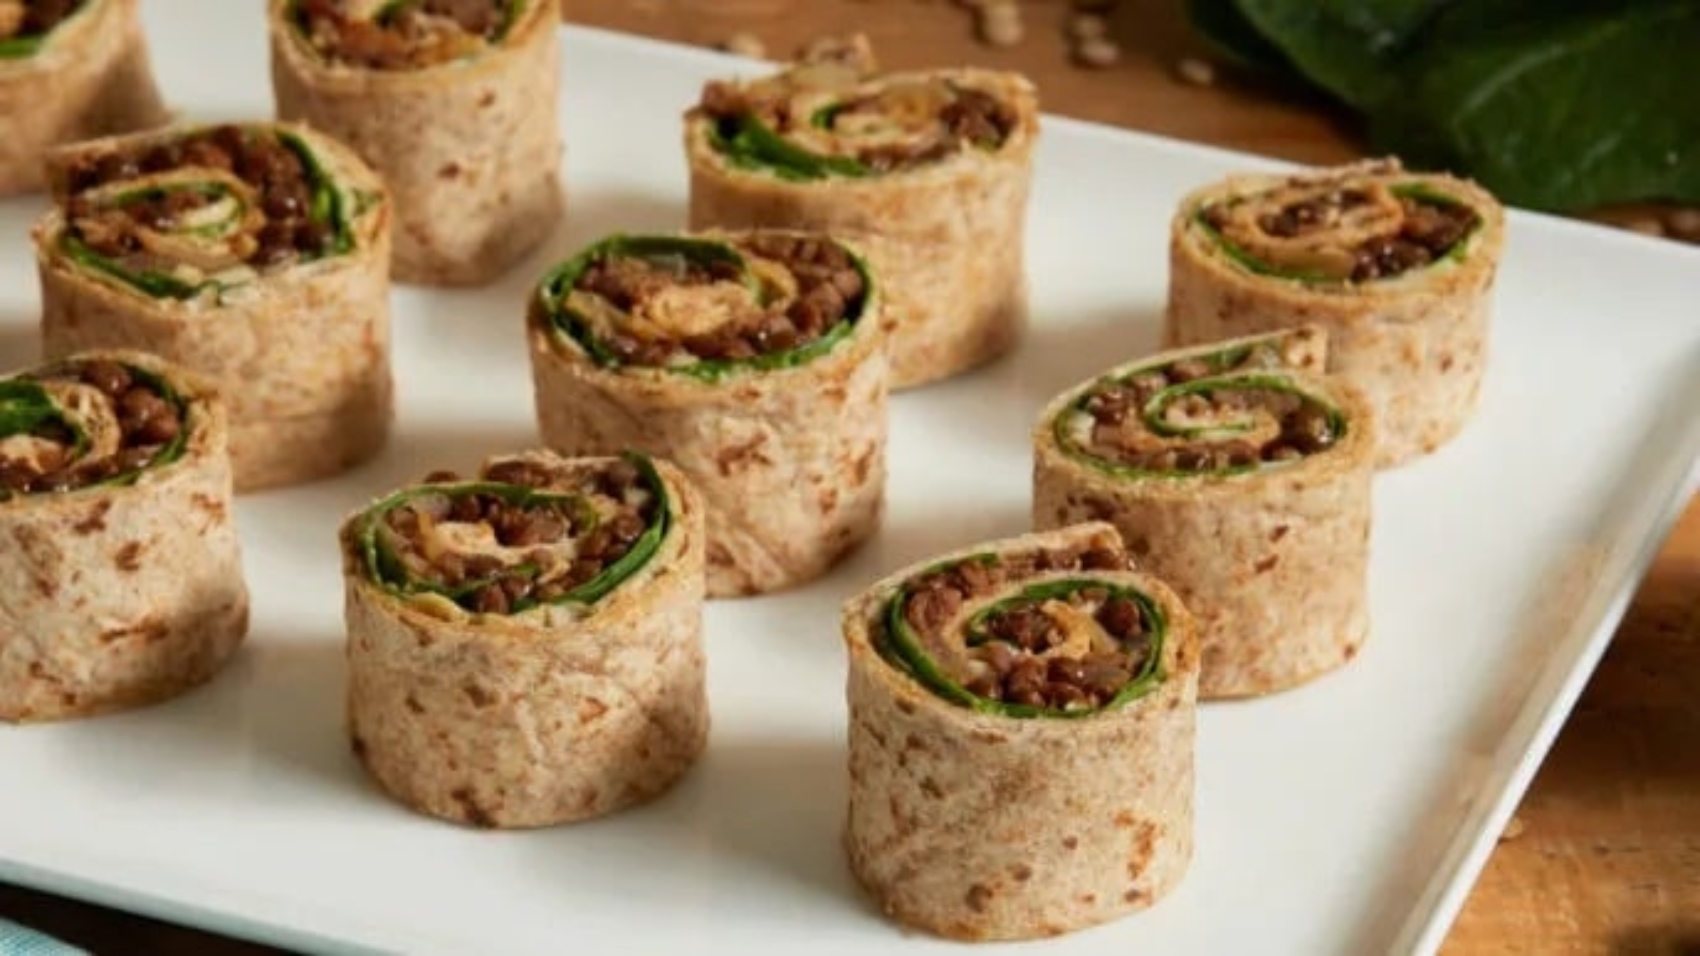
These tasty rollups get their addicting flavor from ras el hanout—a classic North African spice blend of cumin, ginger, and cinnamon. Lentils are mixed with this fragrant seasoning and then packed inside whole wheat tortillas with fresh spinach and creamy hummus. Perfect for both kids and adults, one reader says, “Five stars to the chef! This is a keeper. Easy peasy too!”

These tasty finger foods get their Moroccan flavor from ras el hanout, a classic North African spice blend of cumin, ginger, cinnamon, and other spices that you may have tasted in chickpea stews or tagines. Look for it in the supermarket spice aisle, or make your own.

INGREDIENTS

  • ½ medium onion, cut into ¼-inch dice (1 cup)
  • 6 small cloves garlic, minced
  • 1 teaspoon ras el hanout spice blend
  • 1 15-ounce can lentils, rinsed and drained (1½ cups)
  • 1 tablespoon lemon juice
  • Sea salt and freshly ground black pepper, to taste
  • 3 8-inch whole wheat tortillas
  • 2 cups fresh spinach
  • 1 cup store-bought oil-free hummus

INSTRUCTIONS

  1. In a skillet, combine onion, garlic, and ras el hanout. Add ¼ cup water and sauté 10 minutes, adding water, 1 to 2 tablespoons at a time, as needed to prevent sticking.
  2. Add lentils and lemon juice, and cook for 3 to 4 minutes more to develop flavors. Season with salt and pepper. Remove from heat and let cool for a few minutes.
  3. Meanwhile, wrap the tortillas in a damp paper towel and heat in the microwave for 30 seconds (or heat tortillas one at a time over a gas burner for 30 seconds, quickly wrapping them in the damp paper towel to keep warm).
  4. To assemble roll-ups, place one warmed tortilla on a flat surface. Spread 2 to 3 tablespoons hummus evenly on tortilla, completely covering one side. Spread an even layer of spinach leaves over the hummus, leaving 1 inch clear from tortilla’s edges. Spread ⅓ cup of lentil mixture evenly over spinach. Roll up tortilla snugly, and transfer to a platter. Repeat with the remaining tortillas and toppers.
  5. Just before serving, trim both ends of each roll-up so you have a clean log shape. Cut each log into 5 pieces about 1¼ inches thick.

View List Of All Recipe On Create That Body

Learn More About Isabella Hawke | Follow Us On Facebook | Instagram

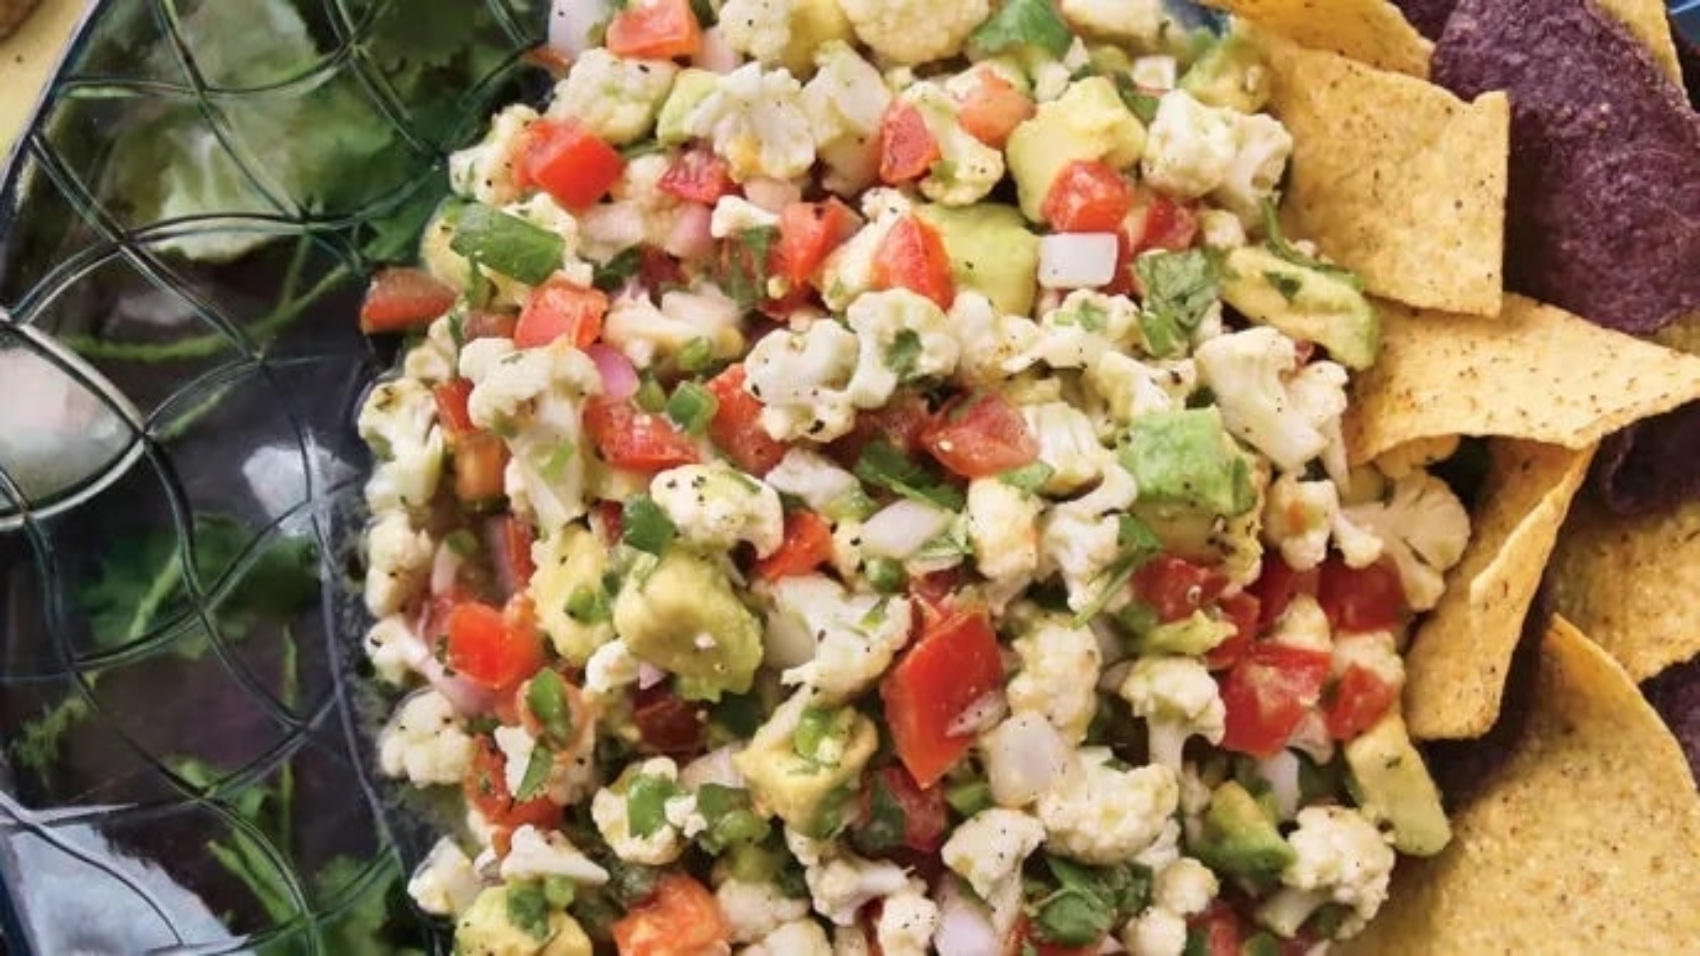
Landlocked Ceviche

Landlocked Ceviche

Landlocked Ceviche

Finely chopped cauliflower takes the place of fish in this zesty vegan ceviche. Tangy red onions, Southwestern spices, and creamy avocado add bold flavor and texture to this dish, which will instantly transport you to the coast. Enjoy with tortilla chips or spoon into whole wheat pita bread pockets for the perfect grab-and-go lunch!

There’s no seafood in this dish, but we don’t think you will miss it—and the fish won’t be mad either. Instead we use cauliflower. The lime juice breaks down its fibers, resulting in a salad or dip so tasty that you won’t want to share. Serve with baked tortilla chips or spoon into whole wheat pitas for a grab-and-go meal. Just cancel the party now and keep it to yourself!

Ceviche dip recipe adapted from Thug Kitchen: Party Grub

INGREDIENTS

  • 1 small head of cauliflower, finely chopped (about 2½ cups)
  • 2 cups tomatoes, diced (about 4 medium)
  • ½ cup chopped red onion
  • 1 jalapeno, diced
  • ¼ teaspoon salt
  • ½ cup lime juice
  • ¼ cup chopped cilantro
  • 1 avocado, diced
  • Freshly ground black pepper, to taste

INSTRUCTIONS

  1. Mix together the cauliflower, tomatoes, red onion, jalapeño, salt, and lime juice in a medium bowl. Add the cilantro and let the mixture sit in the fridge for at least 1 hour.
  2. Add the avocado and black pepper to taste. Serve immediately.

View List Of All Recipe On Create That Body

Learn More About Isabella Hawke | Follow Us On Facebook | Instagram